Hot:
Advanced Search
Link to Content Area

NYCU Information Technology Service Center

::: SITEMAP HOME 中文 NYCU
font-medium
  • font-small
  • font-medium
  • font-large
Share
  • facebook
  • Line
  • Twitter
  • LinkedIn
Search
open menu
  • ::: SITEMAP HOME 中文 NYCU
  • IT Services
    • NYCU Portal
    • NYCU Portal
    • Activating NYCU Portal
    • Forgot Password
    • Networks
    • Wireless Network
    • Eduroam
    • Dormitory Network
    • SSL-VPN
    • Licensed Software
    • Campus Licensed Software
    • Software Download
    • Installation
    • KMS Authentication
    • Q&A
    • MORE+
    • Mail Services
    • Students Email
    • Faculty & Staff Email
    • Web Services
    • Web Hosting
    • Domain Name Server (DNS)
    • Cloud Services
    • Microsoft 365
    • Virtual GPU Server
    • Virtual Private Server (VPS)
    • Virtual Apps Desktop (VAD)
    • NYCU Oauth
    • General Services
    • Computer Classroom
    • Reissuing IC Card
    • Services Regulations
  • News
  • About
    • Service Goals
    • Location
    • Regional Network Center
    • Privacy and Security Policy
  • Related Links
    • Intellectual Property Rights
  • Support
  • line  
  1. :::
  2. HOME
  3. IT Services
  4. Licensed Software
  5. Installation
  6. Anti Virus

Anti Virus

  • xml
  • json
exchangealt 中文
  • Update Date:2025-04-09
  • Units:Center for Information Technology Services
Before installing Apex One, you must first ensure that no other antivirus applications

Install Apex One

I. 

Please download the following files from the campus authorized software FTP first:
  • Apex_One.msi

II. 

Execute Apex One installation file
Please download the Apex One installation file to your computer first.
 
 
Execute OfficeScan Apex One installation file

III. 

Installation process: Click twice on the installation file to start the installation
 
 
Click next

IV. 

Please click the Yes button when this window appears.
 
 
click yes

V. 

The installation process is fully automatic, please wait patiently for Apex One to start in the system.
 
 
finish installation

VI. 

After installation is complete, please reboot
 
 
Small icon of installation completed
 
 
Security protection activated


Install Apex One for MacOS

1. Please download the following files from the campus authorized software FTP first:
  • tmsminstall.zip
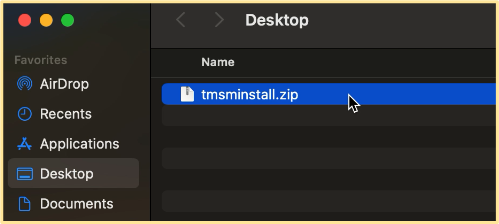
2.Double-click the downloaded compressed file to extract the installation package. 
Double-click the downloaded compressed file to extract the installation package

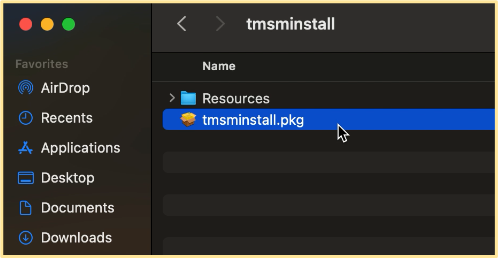
3.Open the extracted folder and double-click the tmsminstall.pkg file to start the installation process.
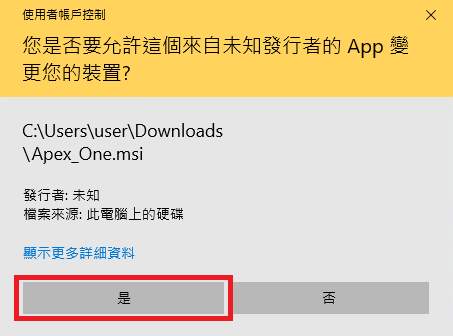
Open the extracted folder and double-click the tmsminstall.pkg file to start the installation process

4.1 Click "Allow"
Click
 
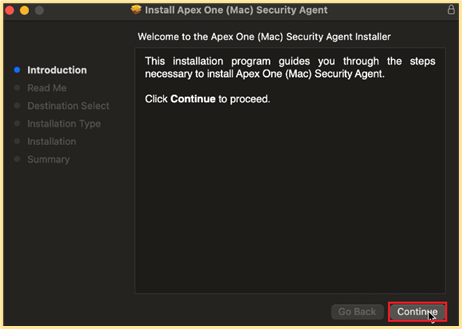
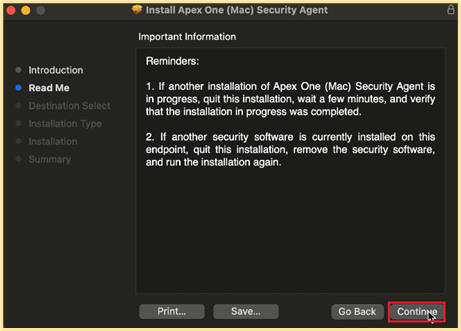
4.2 Click "Continue"
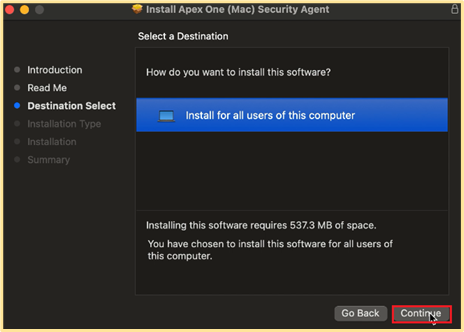
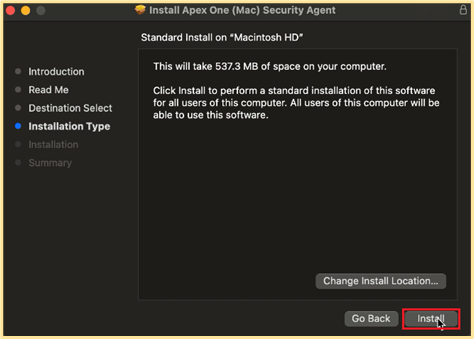
Click
Click
Click

4.3 Click "Install"
Click

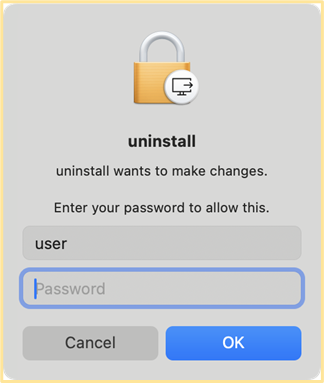
4.4 Enter your computer password and click the "Install Software" button.
Enter your computer password and click the

4.5 Click "Allow"
Click

5.Click the "Continue" button to grant the necessary permissions to Apex One Agent.
Click the
 
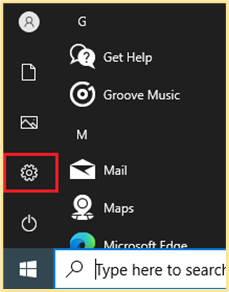
5.1 Open "Privacy & Security".
Open

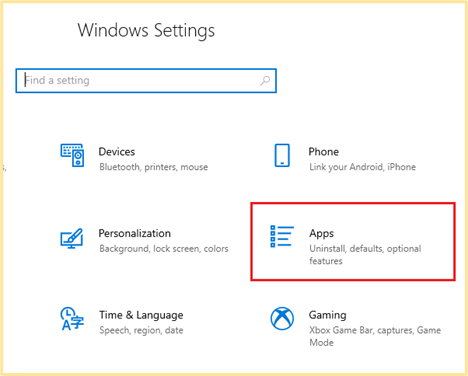
5.2 Click the "Details" button in the Privacy & Security tab.
Click the

5.3 Enter your computer password when prompted.
Enter your computer password when prompted.

5.4 Enable both "iCore Service" and "iCore Service" options.
Enable both

5.5 Select "Allow" when prompted.
 Select

5.6 Click "Continue" to complete the process.
Click

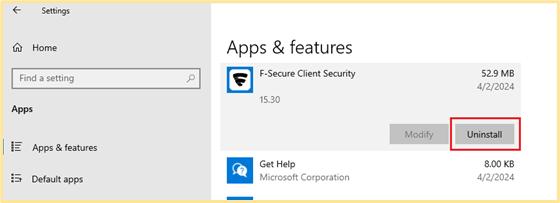
6. To grant full disk access to Apex One Agent, follow these steps:

6.1 Click the "1. Open Full Disk Access" button.
Click the

6.2 In the window that appears, click the "2, 3, 4. Open File Locations" button.
In the window that appears, click the

6.3 Drag and drop the files from the three open windows into the "Full Disk Access" pane.
Drag and drop the files from the three open windows into the

6.4 After opening [1. Open "Full Disk Access"], drag all the files in [2,3,4. "File Location"] to the [1. Open "Full Disk Access"] location and open
After opening [1. Open

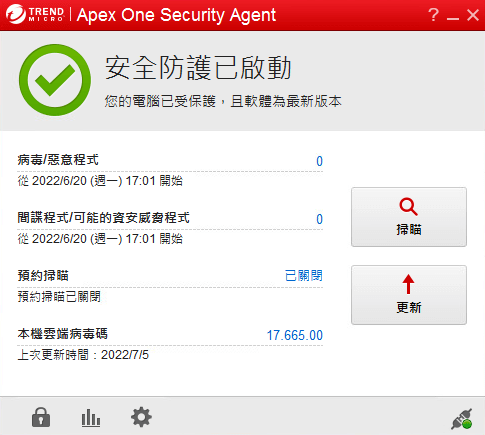
6.5 Once full disk access is granted, click the "Apex One Agent" icon and select "Update" to update the software.
Once full disk access is granted, click the

7. Open the Safari browser. 
If the "Enable Extensions" prompt appears, please enable the function. If the prompt does not appear, please ignore this step.

7.1 Open Safari and click the "Enable Extensions" .
Open Safari and click the

7.2 Click the "Open Safari Extensions " button
Click the

7.3 Check the box next to "Trend Micro Toolbar for Mac".
Check the box next to

7.4 Click the "Enable Protection" button.
If prompted, select "Always Allow on Every Website".
If prompted, select


Remove F-Secure for Windows antivirus software
The computer may be rebooted during the process. Please save the files first.

1.Please click on the lower left corner of the desktop to go to the system’s "Settings".
Please click on the lower left corner of the desktop to go to the system’s

2. Select "Apps"
Select

3. Uninstall F-Secure Client Security.

Fine "F-Secure Client Security"
Click "Uninstall" 
Fine

4. Click on "Yes".
Click on

5. Click on "Uninstall".
Click on

Wait for it to complete and restart the computer
After completion, please restart your computer before installing other anti-virus software.


Remove F-Secure for Mac antivirus software

The computer may be rebooted during the process. Please save the files first.
1. Download uninstall.zip, unzip the "uninstall" program, and click on the program. 
 Download uninstall.zip, unzip the

2. Click on "Uninstall 
Click on


3.Click on "Uninstall 
Click on

4. Enter the startup password and complete the program removal.
Enter the startup password and complete the program removal.

Enter the startup password and complete the program removal.

The program will be uninstalled and a message will appear indicating that the uninstallation was successful.
Please restart your computer before installing other antivirus software.

 
Remove OfficeScan11 antivirus software
The computer may be restarted during the process. Please archive unsaved files first.

I. 

Please click on the lower left corner of the desktop to go to the system’s "Settings".
 
 
Click Settings on the lower left side of the desktop

II. 

Select "Application"
 
 
Select Application

III. 

Click "Programs and Features" on the right.
 
 
Click on Programs and Features

IV. 

 Click "Trend Micro OfficeScan Agent" and click "Change", execute the removal process and follow the steps to uninstall it.
 
 
Click Trend Micro OfficeScan Agent
 
 
next

V. 

Click "Uninstall"
 
 
click uninstall

VI. 

Click "Yes"
 
 
click yes(x64)
 
 
click yes(x86)
 
 
click yes

VII. 

Wait for it to complete and restart the computer
 
 
installing
After completion, please restart your computer before installing other anti-virus software.
Back
Open/Close
  • IT Services
    • NYCU Portal
    • Networks
    • Licensed Software
    • Mail Services
    • Web Services
    • Cloud Services
    • General Services
    • Services Regulations
  • News
  • About
    • Service Goals
    • Location
    • Regional Network Center
    • Privacy and Security Policy
  • Related Links
    • Intellectual Property Rights
  • Support
  • Yangming Campus
  • Address:

    No. 155, Sec. 2, Linong St., Taipei 112304, Taiwan
  • Phone:

    +886-2-2826-7000 #123
  • Service Hours:

    8:00 – 17:00 on Mon. to Fri.
  • Email:

    icc@nycu.edu.tw
  • Chiaotung Campus
  • Address:

    No. 1001, University Rd., Hsinchu 300093, Taiwan
  • Phone:

    +886-3-5712121 #31888
  • Service Hours:

    8:00 – 21:20 on Mon. to Fri., 8:00 – 17:30 on Winter/Summer Vacation
  • Email:

    itsc@nycu.edu.tw

Copyright © 2023 Information Technology Service Center, NYCU. All rights reserved.

AA-Level Accessibility(Open a new window)
  • Privacy and Security Policy
  • Update Date:2025-05-23
  • line
    line
    • NYCU Information Technology Service Cent

智慧小幫手

Hi~需要幫忙嗎?

智慧小幫手

 
gotop